I think this may be the best place to store recipes that folks want going forward. Perhaps I'll eventually get back to updating regularly but here goes my first post in FOREVER! Biggest update is that I have started using Wildtree Herbs and Spices and have absolutely fallen in love. They absolutely make dinner time easier and tastier. So you will see in recipes going forward the use of these spices and I will include substitutions as necessary. Sometimes there is and sometimes there isn't. Feel free to comment and I will do my best to help you out if you didn't want to order anything.
Vegan Mexican Lasagna
1 can refried beans (I used an organic vegetarian variety but any will do - you could even mash a can of black beans or pinto beans with some garlic powder, onion powder, chili powder and salt and call it a day)
1 package tortillas - I prefer corn in this recipe and used a blend of corn and wheat as it's what I had on hand.
1 red bell - roughly diced
1/2 red onion - roughly diced
1 c. frozen corn
1 carrot - roughly diced
1 small zucchini roughly chopped
1 Jar Salsa - pick your heat here
2 T Wildtree Taco Seasoning
1-2 tsp cumin
1 tsp coriander
1/2 tsp salt
1 lime - sliced and ready for juicing
Vegan Queso
1/2 c. soaked cashews
1/4 c. soaked sunflower seeds
1/4 tsp chipotle powder
1/2 cube 'Chicken' bouillon
1/4 c. nutritional yeast
2 cloves garlic
1/4 red onion - raw
1 tsp cumin
1 tsp chili powder
1/2 tsp coriander
Salt as desired
*If you didn't have time to soak these. You can bring to a boil on the stovetop, covered in water, and let go for about 5-10 minutes. For some reason, my cashews always seem to put out a purpley colored foam after a while. I figure this is a good time to take them off the stove and rinse.
Combine all ingredients into a high powdered blender - aka Vitamix. Add in about 1/2 c. to 1 c. of water. You could also do a non-dairy milk here but I find it unnecessary with the high fat content of cashews.
Guacamole -
2 tsp Wildtree guacamole seasoning I use far less than what the company calls for as it does pack some heat)
2 ripe avocados
pinch of salt
Mix together ingredients about 2 hours prior to serving. This is the easier and best guacamole I have ever made.
Prepare your lasagna:
Saute onion in a spot of oil till translucent. Add in red bells, carrot, corn and seasonings. Let saute for 5 minutes. Add in zucchini and continue cooking for an additional 2-3 mins. If necessary - douse the pan with a splash of water to release the spices from the bottom of the pan. I would not add in any extra oil as there is already a substantial amount of healthy fat from the cashew sauce. Remove from heat and get ready to layer.
If desired you can roast your tortillas prior to preparing but I skipped this step in order to save time and found the end result still quite tasty.
Spray an 8 x 8 baking dish. Then add in about 1/4 c. vegan queso - this should be just enough to coat the bottom of the pan. Layer in your tortillas. Spoon on about half a can of the beans and spread to the corners evenly. Pour in half of vegetables. Top with 1/2 c. vegan queso and a squeeze of half a lime. Repeat with tortillas, beans veggies and queso. Top layer should end with tortillas and then queso. Then spoon on dollops of salsa. Oven bake at 375 for 30-35 minutes or until the sides are bubbly and the top looks 'dried' out so to speak. The queso sauce will darken and not be as shiny. Le rest for 5-10 minutes and then slice to serve. Top with guacamole and a lime wedge.
(pictures will be coming...my computer and my phone are not currently talking to one another)
If you make this, please let me know how it goes!
Monday, January 16, 2017

Tuesday, May 22, 2012
Just in time for Memorial Day! Grandma's Cucs and Onions
Having a hard time thinking about what to make for your Memorial Day Party? On a budget? Try this fantastic and super easy salad. It's goes great with Corn on the Cob, BBQ, Burgers, just about anything. It adds the perfect zing to your plate and you can build this creation for about $5!
This is my great grandma's recipe so you can thank her...

1 regular English Cucumber - washed and thinly sliced
1 red onion - thinly sliced
4 tbsp Apple Cider Vinegar
1/3 C. oil of choice
2 tsp fresh dill (or 1/2 tsp dried)
1/2 tsp salt
1/2 tsp sugar
Few cracks of fresh pepper
Combine cucumber and onions in bowl. Chop dill and top with a few cracks of pepper. Mix together vinegar, oil, salt and sugar.


Let sit at room temperature for at least 2 hours before serving, tossing occasionally. Chill leftovers. They'll keep for about 5 days in the fridge. The red onion can sometimes bleed into the dressing turning everything a pinky hue so if you're going to be making this ahead of time, I'd recommend no more than 24 hours in advance.
Variations: Toss in some fresh tomatoes before serving along with some crumbled feta for a delicious greek salad.
This is my great grandma's recipe so you can thank her...
Cucs and Onions

1 regular English Cucumber - washed and thinly sliced
1 red onion - thinly sliced
4 tbsp Apple Cider Vinegar
1/3 C. oil of choice
2 tsp fresh dill (or 1/2 tsp dried)
1/2 tsp salt
1/2 tsp sugar
Few cracks of fresh pepper
Combine cucumber and onions in bowl. Chop dill and top with a few cracks of pepper. Mix together vinegar, oil, salt and sugar.

Drizzle over bowl.

Toss to combine.
Variations: Toss in some fresh tomatoes before serving along with some crumbled feta for a delicious greek salad.
Wednesday, May 2, 2012
Super Cute Lunch Ideas
Ok...so this one isn't exactly related to a recipe per say but it does have to do with some super cute lunch box ideas. Want to create beautiful lunches for your kids to open? Making them feel uber special while enhancing the chances that they'll actually eat that asparagus? Like this...



or this...
Can you see how cute these things are? Another amazing site is Bentoriffic.com. She has put together some adorable lunch box ideas and gives you tutorials. She also has adorable themes to help your kids learn colors and the alphabet! I can't wait to start packing lunches.

Does it get any cuter?
And what's the moral of this? Well it's to promote the site All Things for Sale and their giveaway. Here's the link...you have 1 day to enter to win their beginner kit so don't delay! Click here for the giveaway info.
Happy lunchbox making everyone!
Psst...May is Celiac Awareness Month so I'm going to work hard to bring some new gluten-free recipes to the table. Stay tuned!!!
Saturday, April 21, 2012
Cranberry Quiona Cookies
So we all have the mornings when there's not even time for a bowl of cereal so you walk out the door and hope that the cup of coffee will keep you tided over till lunch. By the time you hit traffic, you think to yourself that the morning decision of skipping breakfast might have been a mistake. Well these little nuggets might be just what you were looking for. They are super simple, especially if you have some leftover quinoa from last night's dinner.
I've mentioned it a couple times on my facebook page that I have ventured in the realm of quinoa cookies. I first saw my inspiration at Once A Month Mom's page for their veggie menu selections. They has a chocolate quinoa muffin and I was blown away. Could it be? A quinoa muffin that was delicious enough for breakfast and yet easy, quick and an on-the-go snack? This is one that almost anyone can enjoy - it's a nut free, dairy free and gluten free bite sized nugget of goodness. After three attempts, I think I might have the recipe to share with you guys. Finally. This is yet again one of those adaptable recipes and would be great made a little bigger and frozen for those mornings when there just isn't enough time in the day. Also, let me preface that this is not my best photography in the world. : )

Cranberry Quinoa Breakfast Cookies
2 c. gluten-free oats (quick-cooking rolled)
1 1/2 c. cooked quinoa
1/2 c. shredded coconut
1/2 c. cranberries
2 ripe bananas - mashed
1/4 c. unsweetened applesauce
1/4 c. maple syrup/agave/honey
1 tsp vanilla extract
1 tsp cinnamon
1/2 tsp ginger
1/4 tsp salt

Mash up the bananas and mix all the other wet ingredients together in a smaller bowl. Combine bowls and mix well. Add in quinoa and mix again. Toss in the cranberries and mix one last time.

This is where you can choose to do a couple things. Roll into balls and place on parchment lined baking sheet making sure to smoosh just a little bit. Or you could spray a tablespoon with cooking spray and scoop it batter, tap onto parchment paper and repeat.

 Or you could press the mixture in a parchment lined glass baking dish. The choice is up to you! However, I would advise that you do individual cookies rather than bars to get the texture that I enjoy. Slightly crisp on the outside and chewy on the inside.
Bake for about 20 minutes at 350. The tops should just be starting to brown. If you've chosen the bar method than the edges should be pretty golden. If you went with the cookie, the bottoms should look like this:

I've mentioned it a couple times on my facebook page that I have ventured in the realm of quinoa cookies. I first saw my inspiration at Once A Month Mom's page for their veggie menu selections. They has a chocolate quinoa muffin and I was blown away. Could it be? A quinoa muffin that was delicious enough for breakfast and yet easy, quick and an on-the-go snack? This is one that almost anyone can enjoy - it's a nut free, dairy free and gluten free bite sized nugget of goodness. After three attempts, I think I might have the recipe to share with you guys. Finally. This is yet again one of those adaptable recipes and would be great made a little bigger and frozen for those mornings when there just isn't enough time in the day. Also, let me preface that this is not my best photography in the world. : )

Cranberry Quinoa Breakfast Cookies
2 c. gluten-free oats (quick-cooking rolled)
1 1/2 c. cooked quinoa
1/2 c. shredded coconut
1/2 c. cranberries
2 ripe bananas - mashed
1/4 c. unsweetened applesauce
1/4 c. maple syrup/agave/honey
1 tsp vanilla extract
1 tsp cinnamon
1/2 tsp ginger
1/4 tsp salt
Combine dry ingredients in a large bowl except cranberries and quinoa.

Mash up the bananas and mix all the other wet ingredients together in a smaller bowl. Combine bowls and mix well. Add in quinoa and mix again. Toss in the cranberries and mix one last time.


Bake for about 20 minutes at 350. The tops should just be starting to brown. If you've chosen the bar method than the edges should be pretty golden. If you went with the cookie, the bottoms should look like this:

Store out in the open in the fridge or in an airtight container. That is of course if they last that long. Enjoy!
Saturday, March 24, 2012
Creamy Carrot Cake Bars
Are you on Pinterest? I just recently started using this fantastic connection site to all these wonderful blogs out there. Though I must admit, I'm a little leery of the trademark and copyright infringements I try to only pin from sites that have the little button already on them. I'm stumbling along someone else's board and I see these Creamy Lemon (or Lime) Bars. I have a huge bag full of limes and decide to give these little guys a try. Oh my! They were amazing. But they had me thinking...they were so easy, what else could I throw in there to make them taste great. I checked my pantry and my fridge and was inspired when I saw pineapple and carrots.

So after dreaming of how delicious these bars would be, I couldn't wait any longer. I brought the leftover lime bars to be shared at daycare and got started on my next adventure.

The whole thing can be made in your food processor and I am definitely one for not making any unnecessary dirty dishes.
These little gems must cool before you indulge because if you try to nibble on them while still scalding hot, you won't be able to enjoy any of the flavors and you'll burn your tongue. Trust me. I did this. The smell was too much!
Creamy Carrot Cake Bars
Crust:
20 Nilla wafers
1/2 White whole wheat flour
1/4 c. salted butter
1/4 c. packed brown sugar
1/2 tsp cinnamon
1/4 tsp ginger
Filling:
1 8 oz package Neufchatel Cream Cheese
1/2 c. unrefined sugar
1/4 c. maple syrup
1/4 c. pineapple juice
2 eggs
3 tbsp white whole wheat flour
1/4 c. pineapple tidbits
2 med carrots - finely grated
1 tsp cinnamon
1 tsp vanilla extract
3/4 tsp ginger
1/4 tsp cloves

Prep square baking dish with parchment paper. Preheat oven to 350. Process wafers in food processor till they're little crumbs of goodness. Don't worry if there is a couple chunks of cookies left - they will get ground later on. Add your flour, sugar, spices. Pulse a couple times to incorporate. Add in your cubes of butter. Pulse till course crumbs form. Pour into prepared pan and press into a crust. Bake 12 minutes.

While baking crust, prep you filling. Cream together cream cheese and sugar till well combined. Add in maple syrup, spices, eggs, extract, juice, flour. Pulse till combined. Add in carrots and pineapple tidbits. Pulse once just to combine. Pour into crust. Bake for 25-30 minutes or until center is set. NOTE! A toothpick will not come out clean on these babies. It's a creamy center. : )


 Let cool on wire rack and place in fridge to continue cooling for at least 2 hours before serving but I would suggest 4-6 hours. Slice and enjoy! I topped mine with whipped cream and toasted coconut.


So after dreaming of how delicious these bars would be, I couldn't wait any longer. I brought the leftover lime bars to be shared at daycare and got started on my next adventure.

The whole thing can be made in your food processor and I am definitely one for not making any unnecessary dirty dishes.
These little gems must cool before you indulge because if you try to nibble on them while still scalding hot, you won't be able to enjoy any of the flavors and you'll burn your tongue. Trust me. I did this. The smell was too much!
Creamy Carrot Cake Bars
Crust:
20 Nilla wafers
1/2 White whole wheat flour
1/4 c. salted butter
1/4 c. packed brown sugar
1/2 tsp cinnamon
1/4 tsp ginger
Filling:
1 8 oz package Neufchatel Cream Cheese
1/2 c. unrefined sugar
1/4 c. maple syrup
1/4 c. pineapple juice
2 eggs
3 tbsp white whole wheat flour
1/4 c. pineapple tidbits
2 med carrots - finely grated
1 tsp cinnamon
1 tsp vanilla extract
3/4 tsp ginger
1/4 tsp cloves

Prep square baking dish with parchment paper. Preheat oven to 350. Process wafers in food processor till they're little crumbs of goodness. Don't worry if there is a couple chunks of cookies left - they will get ground later on. Add your flour, sugar, spices. Pulse a couple times to incorporate. Add in your cubes of butter. Pulse till course crumbs form. Pour into prepared pan and press into a crust. Bake 12 minutes.

While baking crust, prep you filling. Cream together cream cheese and sugar till well combined. Add in maple syrup, spices, eggs, extract, juice, flour. Pulse till combined. Add in carrots and pineapple tidbits. Pulse once just to combine. Pour into crust. Bake for 25-30 minutes or until center is set. NOTE! A toothpick will not come out clean on these babies. It's a creamy center. : )


Wednesday, March 21, 2012
Baked French Toast with Strawberries
I must say I'm addicted to sales. Garage sales, discounts at the grocery, coupons...you name it and if it's on sale, I'm sold! So while strolling through the grocery store, because this is what I do with two kids (yeah right!), I tend to graze the day old bread section and always find something that I can use. Most of the time you'll find not day olds but just the "we made too many of these items and now they're on sale!" stuff. But you can get way more creative with these items than just the usual accompaniment to pasta and soups. They make the most wonderful brunch items!
Stratas or french toast bakes are the the number one thing I go to for a delicious weekend brunch item. With my day old sale bread on hand it makes it super easy! Not to mention, these items freeze well too so you can always hand some on hand. This past weekend I had my bread that was staring at me on the counter and some sad looking strawberries. So while the husband slept and the kiddo enjoyed some Sunday morning cartoons, this is what I came up with...

Baked French Toast with Strawberries
1 loaf of day old bread (I used a multi-grain) + a couple slices of regular bread
2 1/2 c. milk of choice (Coconut is great here - nice and thick)
6 eggs
3/4 c. sugar (unrefined, organic if possible)
2 tsp vanilla extract
1 tsp cinnamon
1/2 tsp ginger
1/4 tsp nutmeg
1/2 tsp salt
8-12 strawberries - roughly chopped
1/4 c. brown sugar for sprinkling
Spray 9x13 glass baking dish and preheat oven to 350. Crack eggs and whisk till blended. Add in milk, sugar, extract, spices and salt. Whisk again till all incorporated. Fold in cubed bread. Make sure every piece is equally soaked and pour into prepared baking dish. Press down bread mixture with back of spatula and pop in the oven for 25 minutes. Remove pan from oven and evenly spread strawberries on top. Sprinkle with brown sugar and continue baking an additional 15 minutes or until sugar has caramelized and toothpick comes out clean from center. Let stand 5-10 minutes before slicing and serving.

Stratas or french toast bakes are the the number one thing I go to for a delicious weekend brunch item. With my day old sale bread on hand it makes it super easy! Not to mention, these items freeze well too so you can always hand some on hand. This past weekend I had my bread that was staring at me on the counter and some sad looking strawberries. So while the husband slept and the kiddo enjoyed some Sunday morning cartoons, this is what I came up with...

Baked French Toast with Strawberries
1 loaf of day old bread (I used a multi-grain) + a couple slices of regular bread
2 1/2 c. milk of choice (Coconut is great here - nice and thick)
6 eggs
3/4 c. sugar (unrefined, organic if possible)
2 tsp vanilla extract
1 tsp cinnamon
1/2 tsp ginger
1/4 tsp nutmeg
1/2 tsp salt
8-12 strawberries - roughly chopped
1/4 c. brown sugar for sprinkling
Spray 9x13 glass baking dish and preheat oven to 350. Crack eggs and whisk till blended. Add in milk, sugar, extract, spices and salt. Whisk again till all incorporated. Fold in cubed bread. Make sure every piece is equally soaked and pour into prepared baking dish. Press down bread mixture with back of spatula and pop in the oven for 25 minutes. Remove pan from oven and evenly spread strawberries on top. Sprinkle with brown sugar and continue baking an additional 15 minutes or until sugar has caramelized and toothpick comes out clean from center. Let stand 5-10 minutes before slicing and serving.

We enjoyed ours with a little shmear of butter and a drizzle of syrup. The options here are endless. You can sprinkle with blueberries, raspberries or pineapple. You can also fold in some diced apples and top with walnuts. If you choose to fold in the fruit, you might want to cut back on the liquid a bit.
We had leftovers for a couple days and they kept beautifully in the fridge. What's better than yummy french toast on a Monday morning? : )
Tuesday, March 20, 2012
Pumpkin Oatmeal Cranberry 'Cookies'

After my cooking marathon that you might have read about in Lemon Pesto Sauce Recipe, I was left with some canned pumpkin. Normally I would throw them into some pancakes and freeze but as you might imagine...I was fresh out of freezer space. Even the ice machine was being used to store all the goodies I made! Yikes! So I searched for some inspiration online via my business page, Round the Table, and folks shouted bread or pancakes. I decided to take it a step further as we were missing our dessert fix. Out of this one little can I was able to make a dozen Cocoa Pumpkin Muffins with Cherries (scented with Cinnamon and Cayenne) and also had about 10 little of these pumpkin delights.

Prior to baking
This is a rough recipe but I think you will find it suitable for the end product. Which is far less like a cookie than I had hoped but much more like a breakfast bar which a delightful surprise. With all this being said, do not attempt to hand these out as cookies to unsuspecting 3 year olds. They will not be fooled. When they think cookie, they're wanting that sugar high which you will not find here.
Pumpkin Oatmeal Cranberry 'Cookies'
1/2 c. canned pumpkin
1 1/2 c. oats
2 tbsp flax seed - ground
1/2 - 1 c. whole wheat pastry flour
3/4 - 1 c. coconut milk
3/4 tsp baking powder
1 tsp cinnamon
1/2 tsp ginger
1/4 tsp nutmeg
1/4 tsp salt
1/2 c. dried cranberries
1/4 c. agave
1/4 c. maple syrup
Mix dry ingredients with a whisk. Mix wet ingredients together. Add to dry. Stir till just incorporated and add in cranberries. Drop onto lined baking sheet. Bake at 350 for 20-25 minutes or until center is set and toothpick comes out clean. You should be able to pick these little gems up and the bottom will be golden and browned. Store in an openish container - like an open ziploc bag or a container with a very loose fitting lid. They could be frozen as well and thawed when you need a nice filling snack! Thaw in microwave for about 60-90 seconds and enjoy.
Monday, March 19, 2012
Lemon Zucchini Pesto Sauce - Freezer Friendly!
Yes, yes...I know! It's been almost 4 months and only 1 post?!?! Don't know what to say other than kiddos and life simply get the best of me. I have a ton of new tweaks on recipes that I'm very eager to share.
Recently I began to subscribing to Onceamonthmom.com and have fell in love! Though you might have to have to use a wee-bit of intuition with some of their recipes, all in all, it's a fabulous time saver and incredibly budget friendly site. I spent a little over $150 on average food. By average, I mean a mix of conventional and organic, and of course we opted for the vegetarian menu but there are 6 - that's right SIX to choose from! I prepared all but one of their selections over the course of 3 days. I know this sounds like a ton of work and I'm not going to lie...it was!

But having had a late start and my 7 mth old around all day, I think I did ok. However, with this 3 days, I have saved myself not only time during the weeknights but also cut down on stress and the grocery bill. To any mamas out there that are struggling with finding inspiration for dinner or just can't seem to find the time to make dinner on a daily basis, I would HIGHLY suggest you check out this amazing site and the wonderful ladies that have put it together.
So where you ask is all of this going? Well I'm here to review the Lemon Zucchini Pesto Sauce that I made a couple weeks ago. We had it fresh that night and again this evening in honor or Meatless Monday - a nationwide movement to encourage people to incorporate a meatless meal into their regular diets and I'm the first to support that. Not only is it good for you to cut back on the meat intake but it's also great for the wallet. This particular meal is probably about $10 to feed a family of four if not less. It's so easy to double and bag to freeze for later. It thaws beautifully though I might add a bit more garlic next time around as that is one flavor that tends to decrease when frozen.
Lemon Zucchini Pesto Sauce
2 medium zucchinis - cut in half moons
2 jars prepared pesto* - if you look in the Italian section you will find a vegan variation. There are at least a couple variations on the shelves that are vegan without being labeled that way.
1 lemon - zested and juiced
2-3 garlic cloves - finely minced or pressed
Heat pan. Toss in zucchini and a tbsp of water (or vegetable stock). Cover and let steam till crisp-tender. Add garlic and heat till fragrant about 30 seconds. Scoop out desired amount of pesto, sprinkle in zest and 2 tbsp lemon juice. Heat another 1-2 minutes. At this point you have two choices - toss in pasta and 1/2 c. cooking liquid from pasta and serve OR whip out your immersion blender. Don't have one? Get one. They are priceless! Stick blender into pan and puree to desired consistency. I'm not a huge fan of the texture of zucchini once frozen and thawed so I left a couple chunks in mine but not much. Let cool and bag in ziplocs. Label and freeze.
To serve at a later date - thaw bag in the fridge the morning of (or even a few hours before you plan to eat.) Boil your pasta - drain but reserve 1/2 c. cooking liquid. Place drained pasta back into pan. Snip corner of ziploc and squeeze out sauce onto hot pasta. Toss. Add in any extra liquid you desire to reach right consistency. Serve! You may garnish with a slice of lemon for a little extra zing.
Sorry no pictures yet but check out http://www.kalynskitchen.com/2011/09/recipe-for-easy-penne-pasta-with.html and http://onceamonthmom.com/vegetarian-march-2012-menu/ for inspiration.
Let me know if you try it and what your thoughts were! Of course the only note I would have right off the bat is had it been the middle of summer, make your own pesto. Save money and get a far superior flavor but it's March and I opted for store bought. : )
Recently I began to subscribing to Onceamonthmom.com and have fell in love! Though you might have to have to use a wee-bit of intuition with some of their recipes, all in all, it's a fabulous time saver and incredibly budget friendly site. I spent a little over $150 on average food. By average, I mean a mix of conventional and organic, and of course we opted for the vegetarian menu but there are 6 - that's right SIX to choose from! I prepared all but one of their selections over the course of 3 days. I know this sounds like a ton of work and I'm not going to lie...it was!

This was before the cooking marathon began. I was feeling so confident that it would stay this way.
But having had a late start and my 7 mth old around all day, I think I did ok. However, with this 3 days, I have saved myself not only time during the weeknights but also cut down on stress and the grocery bill. To any mamas out there that are struggling with finding inspiration for dinner or just can't seem to find the time to make dinner on a daily basis, I would HIGHLY suggest you check out this amazing site and the wonderful ladies that have put it together.
So where you ask is all of this going? Well I'm here to review the Lemon Zucchini Pesto Sauce that I made a couple weeks ago. We had it fresh that night and again this evening in honor or Meatless Monday - a nationwide movement to encourage people to incorporate a meatless meal into their regular diets and I'm the first to support that. Not only is it good for you to cut back on the meat intake but it's also great for the wallet. This particular meal is probably about $10 to feed a family of four if not less. It's so easy to double and bag to freeze for later. It thaws beautifully though I might add a bit more garlic next time around as that is one flavor that tends to decrease when frozen.
Lemon Zucchini Pesto Sauce
2 medium zucchinis - cut in half moons
2 jars prepared pesto* - if you look in the Italian section you will find a vegan variation. There are at least a couple variations on the shelves that are vegan without being labeled that way.
1 lemon - zested and juiced
2-3 garlic cloves - finely minced or pressed
Heat pan. Toss in zucchini and a tbsp of water (or vegetable stock). Cover and let steam till crisp-tender. Add garlic and heat till fragrant about 30 seconds. Scoop out desired amount of pesto, sprinkle in zest and 2 tbsp lemon juice. Heat another 1-2 minutes. At this point you have two choices - toss in pasta and 1/2 c. cooking liquid from pasta and serve OR whip out your immersion blender. Don't have one? Get one. They are priceless! Stick blender into pan and puree to desired consistency. I'm not a huge fan of the texture of zucchini once frozen and thawed so I left a couple chunks in mine but not much. Let cool and bag in ziplocs. Label and freeze.
To serve at a later date - thaw bag in the fridge the morning of (or even a few hours before you plan to eat.) Boil your pasta - drain but reserve 1/2 c. cooking liquid. Place drained pasta back into pan. Snip corner of ziploc and squeeze out sauce onto hot pasta. Toss. Add in any extra liquid you desire to reach right consistency. Serve! You may garnish with a slice of lemon for a little extra zing.
Sorry no pictures yet but check out http://www.kalynskitchen.com/2011/09/recipe-for-easy-penne-pasta-with.html and http://onceamonthmom.com/vegetarian-march-2012-menu/ for inspiration.
Let me know if you try it and what your thoughts were! Of course the only note I would have right off the bat is had it been the middle of summer, make your own pesto. Save money and get a far superior flavor but it's March and I opted for store bought. : )
Friday, January 27, 2012
Leftover grain = Amazing quick breakfast!
Happy Friday to everyone!
As the craziness of moving seems to be settling down, I realize the importance of starting your day on the right foot. I.E. Starting it with the right things in your belly. Most days I normally start my eating routine about 9 or 10 though my kiddos wake up at 6. It just seems to be the time that I can actually sit down and eat which as other parents may know, can be a rarity. Quickness is also key to eating great in the morning. If you fill your face with high sugar cereals and empty calorie juice, you simply won't have the energy to sustain you throughout your day. So let's look at what you had for dinner last night...
Did you happen to have a side of rice? Or quinoa? Or couscous? Well why not make a little extra next time and save it for the morning? I was inspired by my pantry this week. I have all these bulk grains that *tisk*tisk*, I didn't label. Insert frownie face here. I'm not the best at deciphering between them all in their raw form so I've decided to cook up these so-called mystery grains. My first adventure left me with this slightly chewy, nutty, almost sweet tasting grain that I have determined to be oh so wonderful barley. And I have quite a bit of it! So after mixing it into some baby food and forming it into patties with red beans, I still had a few cups left. So of course...I make breakfast! My favorite meal of the day.
This recipe is pretty adaptable to your taste buds. Feel free to substitute any leftover grain you might have in your fridge. I would recommend something on the sturdier side. As with the others I mentioned, forbidden black rice would be another excellent choice.

Rise & Shine Breakfast Barley
1/2 c. cooked grain (Barley)
1/4 c. lite coconut milk (or any other milk you prefer though I like the thickness of coconut)
2 tbsp maple syrup
1/4 c. cranberries
1/4 c. unsweetened coconut
1 tsp vanilla extract
1/2 tsp cinnamon
1/4 tsp cardamom
1/4 tsp nutmeg
1/8 tsp coriander
1 orange of choice (I used mandarin)
Mix together all ingredients except for grain and heat on medium for 1-2 minutes. Add in grain and cook an additional 3-4 minutes or until hot and bubbly. Garnish with zest of orange. And peeled slices.
As the craziness of moving seems to be settling down, I realize the importance of starting your day on the right foot. I.E. Starting it with the right things in your belly. Most days I normally start my eating routine about 9 or 10 though my kiddos wake up at 6. It just seems to be the time that I can actually sit down and eat which as other parents may know, can be a rarity. Quickness is also key to eating great in the morning. If you fill your face with high sugar cereals and empty calorie juice, you simply won't have the energy to sustain you throughout your day. So let's look at what you had for dinner last night...
Did you happen to have a side of rice? Or quinoa? Or couscous? Well why not make a little extra next time and save it for the morning? I was inspired by my pantry this week. I have all these bulk grains that *tisk*tisk*, I didn't label. Insert frownie face here. I'm not the best at deciphering between them all in their raw form so I've decided to cook up these so-called mystery grains. My first adventure left me with this slightly chewy, nutty, almost sweet tasting grain that I have determined to be oh so wonderful barley. And I have quite a bit of it! So after mixing it into some baby food and forming it into patties with red beans, I still had a few cups left. So of course...I make breakfast! My favorite meal of the day.
This recipe is pretty adaptable to your taste buds. Feel free to substitute any leftover grain you might have in your fridge. I would recommend something on the sturdier side. As with the others I mentioned, forbidden black rice would be another excellent choice.

Rise & Shine Breakfast Barley
1/2 c. cooked grain (Barley)
1/4 c. lite coconut milk (or any other milk you prefer though I like the thickness of coconut)
2 tbsp maple syrup
1/4 c. cranberries
1/4 c. unsweetened coconut
1 tsp vanilla extract
1/2 tsp cinnamon
1/4 tsp cardamom
1/4 tsp nutmeg
1/8 tsp coriander
1 orange of choice (I used mandarin)
Mix together all ingredients except for grain and heat on medium for 1-2 minutes. Add in grain and cook an additional 3-4 minutes or until hot and bubbly. Garnish with zest of orange. And peeled slices.
Friday, January 6, 2012
New Year's Resolutions...We all have 'em!
Yikes! It's 2012 already and we are all full of resolutions. At the top of my list is to keep my blog updated for those that follow. I also have the usual list of suspects on there too...eat healthier, work out, etc. Without further ado apologies are in order for letting my blog go by the wayside. It's been almost an entire year! Shame on me for leaving you hanging. Though I must admit, this past year has definitely been a full one. I'm now a licensed and insured Personal Chef as well as a stay-at-home-mom. Who says you can't be both? I also completed my Main Course Certification from the School of Natural Cookery in Boulder which was a phenomenal experience. Wonderful teachers. Wonderful food. It was one of the best weeks of the summer. But...
The biggest news is that we welcomed little Liam on July 13th safely at home. He's almost 6 months now and just starting on solid foods. I can't wait to show him the wonderful world of food! He's already such a great eater that I'm just keeping my fingers crossed that he stays that way. Ethan is still picky but in a different way...he just picks liquids over solids. He'll eat almost anything we put in front of him if he's in the mood for it but mostly he just likes to drink his breakfast, lunch and dinner. With all that being said, he is no stranger to sweet treats. I still have to get creative and so the following recipe was prepared and consumed - quickly! This was a pretty simple one with the handy dandy stand mixer so even the little tot was able to help.
Our letter of the day was also Y. We did a yellow Y for our arts and craft project which led to our baking session because what's yellow in the kitchen? LEMONS!!! : ) Another great way to integrate learning into everyday experiences.
Inspired by a recipe from allrecipes.com
Zucchini Lemon Drop Cookies

6 tbsp c. butter - softened
1/2 c. unrefined natural sugar
1 egg
1/4 c. maple syrup
2 tbsp applesauce
1 med zucchini - finely shredded (about 1 cup)
1 tsp grated lemon peel
1 tsp cinnamon
1 tsp vanilla
1/4 tsp nutmeg
1 c. white whole wheat flour
1/2 c. unbleached all-purpose flour
1/2 c. ground oats
1 tsp baking soda
1 tsp baking powder
1/4 tsp salt
1/2 c. raisins
1/4 c. white chocolate chips (called for walnuts but we were out)
Glaze:
2 tsp lemon juice
2 c. powdered sugar
Cream butter and sugar together. Add in maple syrup, egg, lemon zest, applesauce and vanilla and continue mixing till incorporated. In separate bowl, combine all dry ingredients excluding raisins and chocolate chips. Slowly add to butter mixture and beat on low till blended. Fold in raisins and chocolate chips. Drop onto baking sheet 2 inches apart and bake at 375 for 9-12 minutes.
Let cool and prepare glaze. I wanted mine to be pretty thick so it would hold up overtime. I cut down on the sugar and before frosting, I squeezed a couple drops of lemon juice directly onto cookies. I really wanted the zing!
These were awesome and so cake-like. I enjoyed them with my tea in the morning and with a dollop of whip cream at night. Enjoy!
The biggest news is that we welcomed little Liam on July 13th safely at home. He's almost 6 months now and just starting on solid foods. I can't wait to show him the wonderful world of food! He's already such a great eater that I'm just keeping my fingers crossed that he stays that way. Ethan is still picky but in a different way...he just picks liquids over solids. He'll eat almost anything we put in front of him if he's in the mood for it but mostly he just likes to drink his breakfast, lunch and dinner. With all that being said, he is no stranger to sweet treats. I still have to get creative and so the following recipe was prepared and consumed - quickly! This was a pretty simple one with the handy dandy stand mixer so even the little tot was able to help.
Our letter of the day was also Y. We did a yellow Y for our arts and craft project which led to our baking session because what's yellow in the kitchen? LEMONS!!! : ) Another great way to integrate learning into everyday experiences.
Inspired by a recipe from allrecipes.com
Zucchini Lemon Drop Cookies

6 tbsp c. butter - softened
1/2 c. unrefined natural sugar
1 egg
1/4 c. maple syrup
2 tbsp applesauce
1 med zucchini - finely shredded (about 1 cup)
1 tsp grated lemon peel
1 tsp cinnamon
1 tsp vanilla
1/4 tsp nutmeg
1 c. white whole wheat flour
1/2 c. unbleached all-purpose flour
1/2 c. ground oats
1 tsp baking soda
1 tsp baking powder
1/4 tsp salt
1/2 c. raisins
1/4 c. white chocolate chips (called for walnuts but we were out)
Glaze:
2 tsp lemon juice
2 c. powdered sugar
Cream butter and sugar together. Add in maple syrup, egg, lemon zest, applesauce and vanilla and continue mixing till incorporated. In separate bowl, combine all dry ingredients excluding raisins and chocolate chips. Slowly add to butter mixture and beat on low till blended. Fold in raisins and chocolate chips. Drop onto baking sheet 2 inches apart and bake at 375 for 9-12 minutes.
Let cool and prepare glaze. I wanted mine to be pretty thick so it would hold up overtime. I cut down on the sugar and before frosting, I squeezed a couple drops of lemon juice directly onto cookies. I really wanted the zing!
These were awesome and so cake-like. I enjoyed them with my tea in the morning and with a dollop of whip cream at night. Enjoy!
Saturday, January 15, 2011
Oh My Goodness, Breakfast Strata Bake
Okay ladies and hopefully gentleman...this one is easy and SUPER delicious! I have recently begun cooking for a family that requested some weekend breakfast fare during their mini vacation to the mountains. I gladly obliged as breakfast foods are one of my favorites. I scoured the internet, as I usually do, and my cookbooks to find the perfect recipe for these folks. The dad voiced that he preferred juicy, eggier breakfast dishes so I was thinking a crustless quiche perhaps when I stumbled upon a wide variety of strata variations. This dish really has it all. I mean seriously...everything you could want in a breakfast dish, this one's got it. You have bread of your choice, cheese, meaty part, veggies, eggs and an almost gravy like coating to it all. I can't wait to dip my feet into the world of stratas, both savory and sweet varieties. The possibilities are endless and that is what I truly love about cooking. There are so many flavor combination with different ingredients that the options and variations are truly unimaginable.
Okay enough with the rambling of how amazing this dish was and onto the recipe. Unfortunately, I didn't think to take a picture of this dish while composing but will post a picture soon of the finished dish shortly. Please keep in mind with this dish I was also trying to use up ingredients, as I normally do, and was grabbing almost everything in there. You do not have to abide by these measurements exactly. If you don't have the tofu, add an extra egg. If you're short on zuchinni, who cares? Throw in some shredded carrot or diced celery or simply omit it altogether.
Breakfast Strata
1 lb sausage/ham
1 c. sliced mushrooms
1 clove minced garlic
3/4 c. diced onion
1 c. zuchinni chopped
1 med carrot, grated
3/4 c. green pepper
1/2 c. nonfat milk
5 eggs
8 oz tofu
1/2 nonfat half and half
1 c. mixed cheddar cheese
2 oz cream cheese (I would have used more if I had it on hand...probably more like half a block)
3 c. day old bread (or lightly toasted fresh bread) cubed *I used an Italian style loaf for this and it was perfect*
Preparations instructions are again, up to you a wee bit. You can brown the meat in one pan and the other ingredients in another if you're meat is super oily. Just make sure you drain everything before throwing it together, but here's how I did it this time around...
1.) Saute onion in a wee bit of olive oil for 3 minutes over med heat. Throw in green peppers and saute for addition 4-5 minutes till onion is crisp tender. Add in garlic, carrots, mushrooms, zuchinni and frozen Morning Star Farms Sausage Style Crumbles. Stir and cover. Let heat for 5-6 minutes before stirring and adding seasonings of your choice. I used thyme, oregano and celery salt. And of course the obvious salt and pepper. Continue sauteing an addition 5-6 minutes till the mushrooms have done their thing. Turned a darker brown and look juicy.
2.) Turn out onto paper towels if you have used real meat to drain off excess grease. Blot with extra paper towels if necessary.
3.) While things are simmering away. Heat your cream cheese if not already softened in a large bowl in the microwave. Blend together with half and half and milk. Once combined, add in your eggs and stir thoroughly until the mixture is creamy and smooth. Add in cheese and bread and toss to coat.
4.) Add in veggies and meat to bread mixture. Pour into lightly greased 11x7 baking dish. Place in 350 degree, preheated oven for 35-45 minutes until fork or toothpick inserted into the center comes out clean and your house smells like you've died and gone to heaven.
5.) Remove from oven and let stand for 5-10 minutes before serving. At this time I sprinkled a tiny bit more cheddar cheese on top and let it stand until melted.
Serve and enjoy!!!
Variations I look forward to making in the very near future:
Including only asparagus and mushrooms with an Italian cheese blend
Apple French Toast (I have a thing for apples and french toast)
Blueberry Cream Cheese
'Chicken', swiss cheese and 'ham'
Let me know what you come up with! I'd love to hear how they turn out.
Okay enough with the rambling of how amazing this dish was and onto the recipe. Unfortunately, I didn't think to take a picture of this dish while composing but will post a picture soon of the finished dish shortly. Please keep in mind with this dish I was also trying to use up ingredients, as I normally do, and was grabbing almost everything in there. You do not have to abide by these measurements exactly. If you don't have the tofu, add an extra egg. If you're short on zuchinni, who cares? Throw in some shredded carrot or diced celery or simply omit it altogether.
Breakfast Strata
1 lb sausage/ham
1 c. sliced mushrooms
1 clove minced garlic
3/4 c. diced onion
1 c. zuchinni chopped
1 med carrot, grated
3/4 c. green pepper
1/2 c. nonfat milk
5 eggs
8 oz tofu
1/2 nonfat half and half
1 c. mixed cheddar cheese
2 oz cream cheese (I would have used more if I had it on hand...probably more like half a block)
3 c. day old bread (or lightly toasted fresh bread) cubed *I used an Italian style loaf for this and it was perfect*
Preparations instructions are again, up to you a wee bit. You can brown the meat in one pan and the other ingredients in another if you're meat is super oily. Just make sure you drain everything before throwing it together, but here's how I did it this time around...
1.) Saute onion in a wee bit of olive oil for 3 minutes over med heat. Throw in green peppers and saute for addition 4-5 minutes till onion is crisp tender. Add in garlic, carrots, mushrooms, zuchinni and frozen Morning Star Farms Sausage Style Crumbles. Stir and cover. Let heat for 5-6 minutes before stirring and adding seasonings of your choice. I used thyme, oregano and celery salt. And of course the obvious salt and pepper. Continue sauteing an addition 5-6 minutes till the mushrooms have done their thing. Turned a darker brown and look juicy.
2.) Turn out onto paper towels if you have used real meat to drain off excess grease. Blot with extra paper towels if necessary.
3.) While things are simmering away. Heat your cream cheese if not already softened in a large bowl in the microwave. Blend together with half and half and milk. Once combined, add in your eggs and stir thoroughly until the mixture is creamy and smooth. Add in cheese and bread and toss to coat.
4.) Add in veggies and meat to bread mixture. Pour into lightly greased 11x7 baking dish. Place in 350 degree, preheated oven for 35-45 minutes until fork or toothpick inserted into the center comes out clean and your house smells like you've died and gone to heaven.
5.) Remove from oven and let stand for 5-10 minutes before serving. At this time I sprinkled a tiny bit more cheddar cheese on top and let it stand until melted.
Serve and enjoy!!!
Variations I look forward to making in the very near future:
Including only asparagus and mushrooms with an Italian cheese blend
Apple French Toast (I have a thing for apples and french toast)
Blueberry Cream Cheese
'Chicken', swiss cheese and 'ham'
Let me know what you come up with! I'd love to hear how they turn out.
Thursday, December 30, 2010
Yummy Christmas Bars
The Christmas season has officially passed. At least for me and now that we have a second to breathe I thought I'd share the recipe for the bars that I sent to a few family members. A few years back, we received a whole box of delicious holiday yummies, that we of course gobbled up in a matter of days. This was my inspiration for this year's gifts seeing that we were on a pretty tight budget. I honestly feel that some home made goodies makes the best presents anyway.

I have done my fair share of bar making. These used to be a staple in my house for breakfast, breaks and lunch throw-in's. I've tried probably 10-15 different recipes and a few of my own. Never really loving the end result. Don't get me wrong, they all tasted wonderful, but it seemed like a lot of work and modification for something that tasted pretty simple out of the package. So after searching out something for my dad, given his sometime erratic dietary requirements, I stumbled upon a website detailing the recipe for a very simple, very wholesome Lara-type bar. While never actually eating these bars before, I figured the simplicity of 4-5 ingredients was enough to slim down what I had been doing prior and reinvent my own wheel. I checked my cupboards for the goods and found I was missing whole dates. Now let me warn you, before you set out on a date hunt around the holidays...just go to Whole Foods. Surprising, I know. It was the last place of 8 places I visited that actually had whole pitted dates at a reasonable price. If my memory serves me correct they were $2.69 for 8 oz. With all this being said, if you are fortunate enough to have a Winco around...just head there. Save you a lot of time and money. I do miss that store....
Back to the cupboard. I glance at my pitiful rendition of a food processor. Years back I purchased the blender/processor duo. While the blender does it's job, the supposed food processor is an entirely different story. I don't even think that thing would chop garlic anymore. Not to mention I feel i like i need to put in earplugs to protect my eardrums from the horrilble high pitched noise it makes when I push the 'On' button. My child starts crying, my husband leaves the room and even my dog buries his head in the pillows. I was feeling a little down but then I had a vision of a food processor in a cabinet of this house that we were watching. Reinstating my motivation, I borrowed that Cuisinart 11-cup food processor and got to work.
Ingredients:
1/4 c. chopped dates (you chop them...don't buy the prechopped variety coated with sugar)
1/4 c dried tart berry (I used cherry flavored cranberries)
1/3 c. chopped pecans, almonds or walnuts
Dash of cinnamon

Chop your nuts in the food processor till desired consistency is reached. I liked mine a little more on the little pebble side than big chunk side. Pour into bowl and dash your cinnamon. Mix.
Add dates and cranberries and process till a paste is formed. Upon initial blending and having prior use of such a poor excuse for a food processor, I thought this paste would never happen. I stopped at small pieces and added dried prunes and Voila! Paste.

*note*I did find a little more fruit was necessary but perhaps that's because upon the first go around I didn't get my 'paste' and settled for tiny chopped bits. I figure the more fruit the better though as I LOVE dried fruit.
Take paste and scrape out into bowl. Prepare plastic saran wrap on counter for bar formation. Mix and knead with your hands till all pieces have been coated thoroughly and you're able to make a bar like formation. *note* nobody ever said you had to do bars. you can do balls or fun christmas shapes if you so desire.
Place in plastic wrap and cover tightly. Store in the fridge until you're ready to devour these little delicious treats! They taste so good I seriously though they might be bad for you!

Other varieties I prepared:
Added sunflower seeds and flax seeds to a grinder and made a seed flour almost. Sprinkled in my bars to up the ante.
Peanuts and chocolate chips. Dash of vanilla and you have Peanut Butter Chocolate Chip Bars
Tropical variety fruit and dates pureed with a sprinkle of coconut and nutmeg.
The options are truly endless but check out this website for more!
http://www.wellsphere.com/healthy-cooking-article/homemade-lara-type-bars-energy-bars-part-3/191669

I have done my fair share of bar making. These used to be a staple in my house for breakfast, breaks and lunch throw-in's. I've tried probably 10-15 different recipes and a few of my own. Never really loving the end result. Don't get me wrong, they all tasted wonderful, but it seemed like a lot of work and modification for something that tasted pretty simple out of the package. So after searching out something for my dad, given his sometime erratic dietary requirements, I stumbled upon a website detailing the recipe for a very simple, very wholesome Lara-type bar. While never actually eating these bars before, I figured the simplicity of 4-5 ingredients was enough to slim down what I had been doing prior and reinvent my own wheel. I checked my cupboards for the goods and found I was missing whole dates. Now let me warn you, before you set out on a date hunt around the holidays...just go to Whole Foods. Surprising, I know. It was the last place of 8 places I visited that actually had whole pitted dates at a reasonable price. If my memory serves me correct they were $2.69 for 8 oz. With all this being said, if you are fortunate enough to have a Winco around...just head there. Save you a lot of time and money. I do miss that store....
Back to the cupboard. I glance at my pitiful rendition of a food processor. Years back I purchased the blender/processor duo. While the blender does it's job, the supposed food processor is an entirely different story. I don't even think that thing would chop garlic anymore. Not to mention I feel i like i need to put in earplugs to protect my eardrums from the horrilble high pitched noise it makes when I push the 'On' button. My child starts crying, my husband leaves the room and even my dog buries his head in the pillows. I was feeling a little down but then I had a vision of a food processor in a cabinet of this house that we were watching. Reinstating my motivation, I borrowed that Cuisinart 11-cup food processor and got to work.
Ingredients:
1/4 c. chopped dates (you chop them...don't buy the prechopped variety coated with sugar)
1/4 c dried tart berry (I used cherry flavored cranberries)
1/3 c. chopped pecans, almonds or walnuts
Dash of cinnamon

Chop your nuts in the food processor till desired consistency is reached. I liked mine a little more on the little pebble side than big chunk side. Pour into bowl and dash your cinnamon. Mix.
Add dates and cranberries and process till a paste is formed. Upon initial blending and having prior use of such a poor excuse for a food processor, I thought this paste would never happen. I stopped at small pieces and added dried prunes and Voila! Paste.

*note*I did find a little more fruit was necessary but perhaps that's because upon the first go around I didn't get my 'paste' and settled for tiny chopped bits. I figure the more fruit the better though as I LOVE dried fruit.
Take paste and scrape out into bowl. Prepare plastic saran wrap on counter for bar formation. Mix and knead with your hands till all pieces have been coated thoroughly and you're able to make a bar like formation. *note* nobody ever said you had to do bars. you can do balls or fun christmas shapes if you so desire.
Place in plastic wrap and cover tightly. Store in the fridge until you're ready to devour these little delicious treats! They taste so good I seriously though they might be bad for you!

Other varieties I prepared:
Added sunflower seeds and flax seeds to a grinder and made a seed flour almost. Sprinkled in my bars to up the ante.
Peanuts and chocolate chips. Dash of vanilla and you have Peanut Butter Chocolate Chip Bars
Tropical variety fruit and dates pureed with a sprinkle of coconut and nutmeg.
The options are truly endless but check out this website for more!
http://www.wellsphere.com/healthy-cooking-article/homemade-lara-type-bars-energy-bars-part-3/191669
Monday, December 20, 2010
Oh how I LOVE Scones!
As promised...more frequent blogging entry numero uno! I have been thinking about these scones for a good while now. I have lemons and frozen strawberries from this summer on hand. I figure a scone in the making. Now which recipe? If you've ever searched for scone recipes, there's enough to make your head spin. I have read my fair share and feel that the most important thing to keep in mind while making these is to not handle your dough too much and to keep your ingredients as cold as possible. Now with this all in mind, I set out to make my own scone recipe. Well kind of...
What started as just lemons and strawberry goodness quickly turned into strawberries, peaches and apple goodness. I ran out of strawberries! Whoopsi! So you'll see in the pictures the different rows so to speak, and now you'll know why. I underestimated the amount of red deliciousness that I had on hand. So I used what else I had on hand : )
Very much inspired from pickycook.com

White Chocolate Multi-Fruit Scones
10 tbsp grated frozen butter (I used salted) + 2 tbsp
1 1/2 c. all purpose unbleached flour
1/2 c. whole wheat flour
2 tsp baking powder
Dash of cinnamon and nutmeg
1/3 c. sugar
1/4 tsp baking soda
1/2 c. sour cream
1/2 c. whole milk
Zest of one lemon
White chocolate chips
Strawberries, peaches and apples (or whatever fruit you might want to use up)
Grate the butter and keep it in the freezer till ready to use.

Combine sour cream, baking soda and zest in a small bowl and let stand.
Sift all dry ingredients into a large bowl. Prepare a floured surface and get your rolling pin ready.
Dump in frozen butter into dry ingredients and mix with your hands till all your butter bits have been well blended and represent small peas in your batter. Pour in milk and sour cream mixture and mix till barely incorporated. Turn out onto floured surface. Continue kneading and incorporating with your hands till you have formed a a relatively smooth ball. This should not be anymore than 8-10 full kneads.

Roll dough out to be roughly 12 inch square. Sprinkle with chocolate chips and fruit. Try to bring the mixture all the way out to the edges. Roll up your dough like a pinwheel, carefully eeking away with a scraper if any of your dough has stuck.

With a floured sharp knife, cut your scone shape of our of your log. Place on sprayed parchment paper lined cookie sheet seem side down. Melt 2 tbsp butter and brush over tops.

Put in the middle of your 400 degree, preheated oven and cook 18-20 minutes until lightly golden brown on top. Let cool 3-5 minutes before moving to rack to completely cooling. Best served immediately!
I am storing mine in the fridge. The use of fruit that is normally kept in a cool environment leads to me believe that this is the method of preservation for these little gems.
What started as just lemons and strawberry goodness quickly turned into strawberries, peaches and apple goodness. I ran out of strawberries! Whoopsi! So you'll see in the pictures the different rows so to speak, and now you'll know why. I underestimated the amount of red deliciousness that I had on hand. So I used what else I had on hand : )
Very much inspired from pickycook.com

White Chocolate Multi-Fruit Scones
10 tbsp grated frozen butter (I used salted) + 2 tbsp
1 1/2 c. all purpose unbleached flour
1/2 c. whole wheat flour
2 tsp baking powder
Dash of cinnamon and nutmeg
1/3 c. sugar
1/4 tsp baking soda
1/2 c. sour cream
1/2 c. whole milk
Zest of one lemon
White chocolate chips
Strawberries, peaches and apples (or whatever fruit you might want to use up)
Grate the butter and keep it in the freezer till ready to use.

Combine sour cream, baking soda and zest in a small bowl and let stand.
Sift all dry ingredients into a large bowl. Prepare a floured surface and get your rolling pin ready.
Dump in frozen butter into dry ingredients and mix with your hands till all your butter bits have been well blended and represent small peas in your batter. Pour in milk and sour cream mixture and mix till barely incorporated. Turn out onto floured surface. Continue kneading and incorporating with your hands till you have formed a a relatively smooth ball. This should not be anymore than 8-10 full kneads.

Roll dough out to be roughly 12 inch square. Sprinkle with chocolate chips and fruit. Try to bring the mixture all the way out to the edges. Roll up your dough like a pinwheel, carefully eeking away with a scraper if any of your dough has stuck.

With a floured sharp knife, cut your scone shape of our of your log. Place on sprayed parchment paper lined cookie sheet seem side down. Melt 2 tbsp butter and brush over tops.


Put in the middle of your 400 degree, preheated oven and cook 18-20 minutes until lightly golden brown on top. Let cool 3-5 minutes before moving to rack to completely cooling. Best served immediately!
I am storing mine in the fridge. The use of fruit that is normally kept in a cool environment leads to me believe that this is the method of preservation for these little gems.
Sunday, December 19, 2010
More Random Photos for the curious reader...
I want to thank all of those who have checked out my blog. Things have been absolutely crazy for me recently and thus the reason that there haven't been too many new posts. On the bright side, we are finally moved in and I have all of my kitchen gadgets and goodies back at my fingertips. We also have a camera ready to snap away those delicious images.
Tomorrow morning I'm setting out to make Lemon Strawberry Scones, Zucchini Fritters and Lara-Type Energy Bars. I will of course keep you posted on everything! Pictures and of the course the almighty recipes that I do my best to follow. ; )
In the meantime, I wanted to post a few pictures of some random events to keep those of you that are checking this little blog of mine still interested. Again, these are recipe-less but for those of you who might be more into the visual aspects of what's in store, please enjoy!


Tomorrow morning I'm setting out to make Lemon Strawberry Scones, Zucchini Fritters and Lara-Type Energy Bars. I will of course keep you posted on everything! Pictures and of the course the almighty recipes that I do my best to follow. ; )
In the meantime, I wanted to post a few pictures of some random events to keep those of you that are checking this little blog of mine still interested. Again, these are recipe-less but for those of you who might be more into the visual aspects of what's in store, please enjoy!

This was a spread I created on 24 hour notice for a dear friend's wedding reception. Some basic staples but it was almost gone at the end! It was a joy to come up with something on her special day.


This was breakfast for my Pub family. Some type of Apple Spice Cake...Scrumptious! I must say I do miss my mornings where I check the fridge and of course the time and what delicious breakfast treat I can come up with...perhaps upon a return visit I should surprise my old friends with some more muffins or perhaps that braided bread for Adele!

Banana Muffins with 'Eggs' Benedict and a mock Hollandaise Sauce

Years ago I first made this Fruit Makeover Pizza for 4th of July. I have been making it upon request ever since! Super simple and super delicious...you can't have just one slice.
Well that's all for now folks! I'll be blogging more frequently from now on...I PROMISE!!! So stay tuned...
Tuesday, October 19, 2010
Polenta Pesto Heaven
Wow is all I really have to say here. I've been venturing out lately in about everything I've created recently. It's all been edible but nothing has stood as vibrantly flavored as this dish. And the best part? It was SOOOOOO simple. All of these ingredients could be made from scratch and it would probably taste even more fantastic but given certain time constraints...I.E. Having a toddler running around, I think recipe taste amazing as it is.
Ingredients:
1 tube polenta (I used an herbed variety)
1 jar Classico Alfredo sauce
1 jar Classico Marinara sauce
1 bag shredded Italian Cheese
Pesto (I used about 3/4 of the pre-made kind)
1 medium onion - chopped
1 small pepper - chopped
6 oz mushrooms - chopped
1 tsp marjoram
1 tbsp butter
1/4 c. dry white wine
Directions:
Preheat oven to 400. Slice polenta about 1/4' thick. Prepare baking sheet with aluminum foil and coat with nonstick spray. Bake polenta till crispy and flip to other side. This should take about 6-8 minutes per side. Once crisped, remove from oven and let cool.
While baking polenta, heat olive oil in medium skillet over med-high heat. Saute onion 3-4 minutes and add pepper. Saute an addition 3 minutes. Add mushrooms, butter and marjoram. By this time you should have some nice brown spots on the bottom of your pan. Deglaze the pan with the wine and make sure you stir frequently to get all those yummy bits off the bottom. Continue sauteing an addition 2 minutes.
Prepare 8x10 (ish) baking dish by coating bottom of pan with 1/2 c. marinara sauce. Layer in polenta. Spread a tsp of pesto on each polenta slice. Top with mushroom mix. At this point you could add a protein of your choice. I used about 1/2 c. veggie crumbles. You could omit this altogether if you want it to be completely gluten free. Top with about 1/2 c. alfredo and 1/2 c. marinara. Sprinkle on 1/2 c. cheese.
Repeat with remaining polenta, pesto and sauce. You'll want to make sure the sauce on top covers all the edges of the polenta. Bake uncovered about 20 minutes. Remove from oven and sprinkle 1 c. cheese. Move pan closer to heat source in the oven and continue baking an additional 10 minutes until top is melted and bubbly all over.
Let stand 10 minutes before digging in!
*I will definitely up the quantities next time. This would probably serve 5-6 for dinner if accompanied with a salad and some garlic bread. In my house it lasted barely 24 hours.
Ingredients:
1 tube polenta (I used an herbed variety)
1 jar Classico Alfredo sauce
1 jar Classico Marinara sauce
1 bag shredded Italian Cheese
Pesto (I used about 3/4 of the pre-made kind)
1 medium onion - chopped
1 small pepper - chopped
6 oz mushrooms - chopped
1 tsp marjoram
1 tbsp butter
1/4 c. dry white wine
Directions:
Preheat oven to 400. Slice polenta about 1/4' thick. Prepare baking sheet with aluminum foil and coat with nonstick spray. Bake polenta till crispy and flip to other side. This should take about 6-8 minutes per side. Once crisped, remove from oven and let cool.
While baking polenta, heat olive oil in medium skillet over med-high heat. Saute onion 3-4 minutes and add pepper. Saute an addition 3 minutes. Add mushrooms, butter and marjoram. By this time you should have some nice brown spots on the bottom of your pan. Deglaze the pan with the wine and make sure you stir frequently to get all those yummy bits off the bottom. Continue sauteing an addition 2 minutes.
Prepare 8x10 (ish) baking dish by coating bottom of pan with 1/2 c. marinara sauce. Layer in polenta. Spread a tsp of pesto on each polenta slice. Top with mushroom mix. At this point you could add a protein of your choice. I used about 1/2 c. veggie crumbles. You could omit this altogether if you want it to be completely gluten free. Top with about 1/2 c. alfredo and 1/2 c. marinara. Sprinkle on 1/2 c. cheese.
Repeat with remaining polenta, pesto and sauce. You'll want to make sure the sauce on top covers all the edges of the polenta. Bake uncovered about 20 minutes. Remove from oven and sprinkle 1 c. cheese. Move pan closer to heat source in the oven and continue baking an additional 10 minutes until top is melted and bubbly all over.
Let stand 10 minutes before digging in!
*I will definitely up the quantities next time. This would probably serve 5-6 for dinner if accompanied with a salad and some garlic bread. In my house it lasted barely 24 hours.
Tuesday, October 12, 2010
Chicken Broccoli Casserole
This one is a staple in my house. So easy. So quick. So delicious! You could sub out zuchini and onions for the base. Or perhaps mixed veggies? Onions and green chilis for a mexican flare? I have never tried any of these but I don't see how you could go wrong.
Ingredients:
2 10 oz packages frozen chopped broccoli - cooked till crisp tender and drain
2 packages Morning Star Farms chicken nuggets
1 can cream of mushroom soup
1/2 c. mayonnaise
cheddar cheese
3 1/2 tbsp melted butter
3 c. cornflakes (measured and then crushed)
Directions:
Layer in drained broccoli in bottom of 9x13 baking dish. Top with nuggets. Mix together soup and mayonnaise and cover nuggets. Sprinkle cheese. Combine cornflakes and melted butter till fully coated. Cover cheese with cornflakes. Bake at 350 for 25-30 minutes till bubbly. Cool 15 minutes before serving.
**Original recipe calls for 4 chicken breasts - boiled and shredded. I have done this and it sees to take forever. If you are a meaty family, I believe you could just as simply use some natural alternative...frozen chicken strips? frozen chicken nuggets? This would speed up assembly greatly if you could skip the boiling and shredding process.
Ingredients:
2 10 oz packages frozen chopped broccoli - cooked till crisp tender and drain
2 packages Morning Star Farms chicken nuggets
1 can cream of mushroom soup
1/2 c. mayonnaise
cheddar cheese
3 1/2 tbsp melted butter
3 c. cornflakes (measured and then crushed)
Directions:
Layer in drained broccoli in bottom of 9x13 baking dish. Top with nuggets. Mix together soup and mayonnaise and cover nuggets. Sprinkle cheese. Combine cornflakes and melted butter till fully coated. Cover cheese with cornflakes. Bake at 350 for 25-30 minutes till bubbly. Cool 15 minutes before serving.
**Original recipe calls for 4 chicken breasts - boiled and shredded. I have done this and it sees to take forever. If you are a meaty family, I believe you could just as simply use some natural alternative...frozen chicken strips? frozen chicken nuggets? This would speed up assembly greatly if you could skip the boiling and shredding process.
Stuffed Poblano Peppers
So I've mentioned the Bountiful Basket and I've mentioned Vegetarian Times but I haven't mentioned how great it is when the recipes from the Times coincide with the ingredients received in my basket! The Times had a whole section on poblanos this month. Unfortunately most of their recipes called for double the amount I had on hand. They did give me some inspiration though and thus we have...
Stuffed Poblano Peppers
Ingredients:
3 poblanos - sliced in half and seeded
1 lb Ground meat *your choice. Chicken, Turkey, Beef? I used Morning Star Farms Crumble*
1/2 onion chopped
Red bell pepper - diced
3 cloves garlic - minced
1/2 c frozen corn
1/2 c. shredded zuchini
Juice of one lime
Chili powder
Cumin
Garlic powder
Coriander
Paprika
Shredded cheese (I used a mexican blend)
Garnishes:
Cilantro
Sour Cream
Directions:
Bring a large pot of water to a boil. Parboil sliced pobalanos for about 6-7 minutes until a little tender. Remove and drain.
In the meantime, heat a med skillet and toss in onion. Satue 2-3 minutes and add all other veggies and meat*. Continue cooking for about 3-4 minutes. Sprinkle in spices and juice. Cook till all veggies are done. Gently stuff peppers with veggie/meat combo. Top with cheese and bake in preheated (350) oven till cheese is melted. Top with sour cream and cilantro and serve! To make this dish a little more hearty you could serve this over quinoa or rice.
*Only add meat in this step if it is some form of mockmeat. Otherwise you will need to brown your meat first. Drain and remove from pan. Set aside and continue with onion saute.
Stuffed Poblano Peppers
Ingredients:
3 poblanos - sliced in half and seeded
1 lb Ground meat *your choice. Chicken, Turkey, Beef? I used Morning Star Farms Crumble*
1/2 onion chopped
Red bell pepper - diced
3 cloves garlic - minced
1/2 c frozen corn
1/2 c. shredded zuchini
Juice of one lime
Chili powder
Cumin
Garlic powder
Coriander
Paprika
Shredded cheese (I used a mexican blend)
Garnishes:
Cilantro
Sour Cream
Directions:
Bring a large pot of water to a boil. Parboil sliced pobalanos for about 6-7 minutes until a little tender. Remove and drain.
In the meantime, heat a med skillet and toss in onion. Satue 2-3 minutes and add all other veggies and meat*. Continue cooking for about 3-4 minutes. Sprinkle in spices and juice. Cook till all veggies are done. Gently stuff peppers with veggie/meat combo. Top with cheese and bake in preheated (350) oven till cheese is melted. Top with sour cream and cilantro and serve! To make this dish a little more hearty you could serve this over quinoa or rice.
*Only add meat in this step if it is some form of mockmeat. Otherwise you will need to brown your meat first. Drain and remove from pan. Set aside and continue with onion saute.
Glazed Carrots
I recently was treated to an amazing culinary course this past weekend thanks to my most amazing friend. Though not what I expected, I left the class feeling better then ever about my refrigerator and it's contents. My relationship with recipes has never been too strict but I still always get the nagging feeling of "Well nope! Can't make that one...I'm missing that one ingredient." Michelle Reynolds helped to allow me feel even more confident when I open up the doors to that chilly box. Anything is possible with what you have on hand...unless of course your pantry, cupboards and freezer are completely empty. Then you're S.O.L. Sorry.
But on the upside, I participate in the most unbelievable program called Bountiful Baskets. If you don't know what it is...stay tuned. I'll be posting pictures. Quick run down is that you pay a contribution fee every week or two and you get a large supply of fresh regional produce. It is then up to you what to do with it all! That's the exciting part for me because *insert Forest Gump voice here* you never know what you're gonna get. I recently received plantains which sat next to my potatoes for a few weeks until I discovered that nothing can taste bad with rum, butter, maple syrup and a few fresh cracks of cinnamon! Especially when drizzled with vanilla yogurt. : )
Now keeping this all in mind...I went to go make dinner last night. I opened up the doors and checked out my carrots that are near their end. I hate throwing away food so I decided this would be the staple of my side dish. That's when some Balsamic Glazed Carrots came to mind. I had some cabbage, also from my basket, that had been sitting around a while and some frozen french cut green beans. Sounds like the making of a healthy yet satisfying accompaniment.
Again...camera down so there won't be pictures for a while but let's just say this dish was so tasty that my son was begging for more! Yay!! Success!!
Balsamic-E Veggies
4 carrots - peeled and cut into 2" sticks
3/4 c. thinly sliced cabbage
1/2 c. frozen french cut green beans
2-3 cloves garlic - chopped
2 tbsp hoisin sauce (from the amazing Teriyaki company...you know the one I'm talking about. I accidentally purchased this flavor variety but was shooting for the veri teriyaki so use that if it's in your cupboard)
1/4 c. balsmic vinegar
2 tbsp unpacked brown sugar
Sprinkle of kosher salt
Heat oil in skillet and add carrots. I had some wok oil sitting around and thought that would add a nice flare. Get a nice sear on the carrots and add remaining veggies and garlic. I covered my carrots and sauteed about 5-7 minutes. Cook for an additional 2 minutes and add in Hoisin sauce and balsamic vinegar. Sprinkle with salt, sugar and toss. Place in preheated oven (350) for about 15 minutes while you finish up the rest of your meal. Serve over rice, couscous, quinoa for even more satisfaction.
But on the upside, I participate in the most unbelievable program called Bountiful Baskets. If you don't know what it is...stay tuned. I'll be posting pictures. Quick run down is that you pay a contribution fee every week or two and you get a large supply of fresh regional produce. It is then up to you what to do with it all! That's the exciting part for me because *insert Forest Gump voice here* you never know what you're gonna get. I recently received plantains which sat next to my potatoes for a few weeks until I discovered that nothing can taste bad with rum, butter, maple syrup and a few fresh cracks of cinnamon! Especially when drizzled with vanilla yogurt. : )
Now keeping this all in mind...I went to go make dinner last night. I opened up the doors and checked out my carrots that are near their end. I hate throwing away food so I decided this would be the staple of my side dish. That's when some Balsamic Glazed Carrots came to mind. I had some cabbage, also from my basket, that had been sitting around a while and some frozen french cut green beans. Sounds like the making of a healthy yet satisfying accompaniment.
Again...camera down so there won't be pictures for a while but let's just say this dish was so tasty that my son was begging for more! Yay!! Success!!
Balsamic-E Veggies
4 carrots - peeled and cut into 2" sticks
3/4 c. thinly sliced cabbage
1/2 c. frozen french cut green beans
2-3 cloves garlic - chopped
2 tbsp hoisin sauce (from the amazing Teriyaki company...you know the one I'm talking about. I accidentally purchased this flavor variety but was shooting for the veri teriyaki so use that if it's in your cupboard)
1/4 c. balsmic vinegar
2 tbsp unpacked brown sugar
Sprinkle of kosher salt
Heat oil in skillet and add carrots. I had some wok oil sitting around and thought that would add a nice flare. Get a nice sear on the carrots and add remaining veggies and garlic. I covered my carrots and sauteed about 5-7 minutes. Cook for an additional 2 minutes and add in Hoisin sauce and balsamic vinegar. Sprinkle with salt, sugar and toss. Place in preheated oven (350) for about 15 minutes while you finish up the rest of your meal. Serve over rice, couscous, quinoa for even more satisfaction.
Old pictures...
While I can't remember the exact recipes of these, I just wanted to share some old food pictures of composed dishes I've made. These are pretty much the reason I started this blog. I would make something, take a picture, it would taste delicious and I couldn't remember how to make it again! It was and still is truly maddening. Hopefully I will get better at this and keep better track of what I add to these dishes to make them so scrumdillyumptious!
 Some type of potato corn chowder with veggies.

Stroganoff...where is the darn recipe?!?!? This was soooo good.

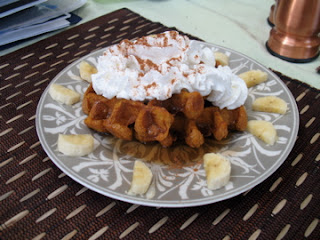


Stroganoff...where is the darn recipe?!?!? This was soooo good.


Can we say YUMMY?!?!?! These were from Vegan with Vengeance (I think) Banana oatmeal waffles?
Tofu scramble
There is simply no better way to start your day than this delicious tofu scramble. I have tweaked and will continue to tweak this recipe so remember to have fun when composing your own version. Tofu is extremely versatile because it soaks up all the delicious spices you have to offer giving it just about any flavor you desire. My initial winning dish was adapted from Vegan with a Vengeance. With the addition of a few elements, you can have greatness here.
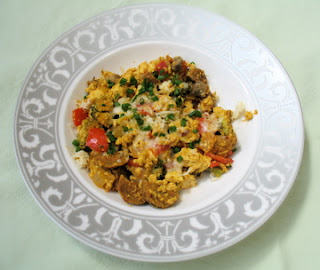
Easy Breezy Tofu Scramble
Ingredients:
1 pkg extra firm tofu - lightly squeezed and drained
2 links Tofurky sausage (or Morning Star Farms patties or omit completely)
1/2 onion finely - chopped
2 cloves garlic - finely chopped
Grated carrot
1/2 c. mushrooms - sliced and chunked
2 tsp cumin
1 tsp turmeric
1 tsp thyme
1 tsp lemon pepper
1/2 tsp chili powder
1/2 tsp coriander
1/2 tsp paprika
2 tbsp Bragg's
1/4 c. nutritional yeast
Directions:
Heat oil in large skillet. Add onion and saute about 3-4 minutes. Add garlic, sausage, mushrooms and carrots. Saute 4-5 minutes till veggies are crisp-tender. Add spices and saute, stirring constantly about 1 minutes. Crumble in tofu and stir until spices have permeated all sides of tofu. Add braggs and about 1/4 c. water. Cover and simmer about 10 minutes.
Once water is almost evaporated add yeast and stir till dissolved. Serve at once. Top with parsley and cheese of your choice or as is.

Easy Breezy Tofu Scramble
Ingredients:
1 pkg extra firm tofu - lightly squeezed and drained
2 links Tofurky sausage (or Morning Star Farms patties or omit completely)
1/2 onion finely - chopped
2 cloves garlic - finely chopped
Grated carrot
1/2 c. mushrooms - sliced and chunked
2 tsp cumin
1 tsp turmeric
1 tsp thyme
1 tsp lemon pepper
1/2 tsp chili powder
1/2 tsp coriander
1/2 tsp paprika
2 tbsp Bragg's
1/4 c. nutritional yeast
Directions:
Heat oil in large skillet. Add onion and saute about 3-4 minutes. Add garlic, sausage, mushrooms and carrots. Saute 4-5 minutes till veggies are crisp-tender. Add spices and saute, stirring constantly about 1 minutes. Crumble in tofu and stir until spices have permeated all sides of tofu. Add braggs and about 1/4 c. water. Cover and simmer about 10 minutes.
Once water is almost evaporated add yeast and stir till dissolved. Serve at once. Top with parsley and cheese of your choice or as is.
Subscribe to:
Posts (Atom)